Computer Scrapbooking
Creating Your First Computer Layout
This is a quick guide to get you on the way to creating your first computer-generated layout. We shall have a brief look at the advantages of computer scrapbooking before taking you through a working example. The tool we shall be using for this is Paint Shop Pro for the PC.
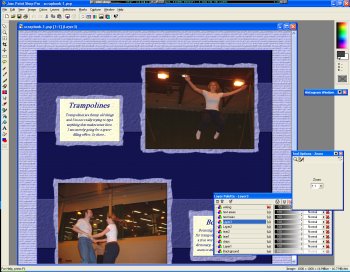
A screenshot of Paint Shop Pro
Advantages of Computer Scrapbooking
Computer systems have reached a point in their evolution where it is now possible to allow us to create effective, and possibly even realistic, layouts without having to resort to the use of real materials.
This relatively new field heralds some rather significant advantages over traditional paper-based scrapbooking.
Cheaper
Computer Scrapbooking is cheaper than traditional paper-based scrapbooking. All you have to pay for is the price of the software you are willing to use. Some suitable software is even free! Note that I am neglecting to account for the cost of your computer, as I am assuming that by reading this, you already have one and use it for other purposes also :-)
Correct Mistakes
Paint Shop Pro (and lots of other similar software) offer "undo" features. Accidentally drawn on the wrong bit of paper? No problem - simply "undo" your actions and you'll be taken back in time to before you made the mistake. This makes it much easier to test out new ideas, as you can simply "undo" the results if you don't like them.
Unlimited Supplies
With computer scrapbooking, you never need to worry about running out of paper, as it never really existed in the first place! You can also choose from any colour you want. The limit is your imagination.
Easy Distribution
Computer scrapbooking means that whatever you make, it's already going to be in an electronic format that is suitable for electronic distribution, so you can email it to your friends without even needing to go near a scanner.
Requirements for Computer Scrapbooking
In this guide, we shall be using a simple graphics tool to create an example layout. You will need only the following: -
- A PC running Windows
- Paint Shop Pro (version 6 or greater is fine)
Paint Shop Pro is shareware, which means you can try out its full functionality for 30 days before you have to buy it. You can download it from the Jasc Software web site.
Other optional requirements will be detailed as we go. I would recommend reading the Paint Shop Pro help files for further information about each of the tools we shall be using. If you are familiar with the use of other paint packages, then feel free to experiment with those instead!
Choosing a Size for your Computer Layout
The size of your computer layout depends on various factors. The more memory (RAM) your computer has, the larger it can be. In this guide, we shall be creating a blank layout of size 1200x1200 pixels. This is sufficiently large to show most of the details we will be adding.
Note that if you want to print out your layout, then you will probably want to try and achieve at least 300dpi (dots per inch). This means your layout will have to be at least 3600x3600 pixels in size to print out a 12 inch square layout. You may need a lot of memory for images of this size, so be warned!
If you haven't already done so, start up Paint Shop Pro.
You will then need to create a blank layout so we can
begin adding things to it.
Click on the File menu and select New.
Create an image 1200x1200 pixels in size.

The new image dialog
Creating the layout background
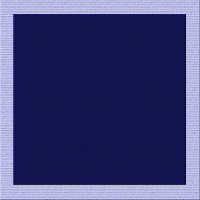
We'll start by adding a pale blue textured background to the page. Select the Flood Fill tool and fill the entire picture with a pale blue colour.

Pale blue background
Adding Texture to the Paper
To make the background "paper" appear more realistic, we shall use
one of Paint Shop Pro's texturing tools. Click on the Image
menu, then select Effects and then Texture.
Select a texture similar to that shown below. Note that the size of
the texture has been raised to 200% to make it suit the layout size better.

The texture dialog
Blurring the Texture
Because the texture we applied was scaled more than 100%, we shall
remove the large pixel effect by blurring the image. Click on the
Image menu and select Blur then Blur
again.
Adding Shadows to the Paper Edges
To make the edges of the paper seem more natural, we can add an
inner bevel effect. This makes the paper seem more three-dimensional,
as if it has a slight shadow around the edges away
from the light. Click on the Selections menu and
Select All. This places a dashed box around the
entire background, which is want we want to apply the effect to.
Click on the Image menu, then Effects
and then Inner Bevel. Choose settings similar to
those shown below. Notice how the bottom right of the paper now has
a darkened edge which looks like a shadow.
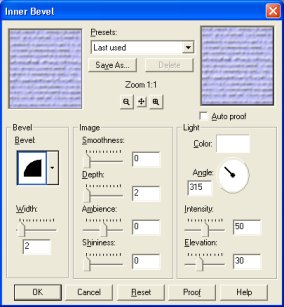
The Inner Bevel dialog
Adding Another Layer of Paper
Now we shall add a layer of navy blue paper on top of the light
blue paper. We shall add this as a new Paint Shop Pro layer so
we can move it independently of the background whenever we want.
Create a new layer in Paint Shop Pro by clicking on the Layer
menu and then New Raster Layer.
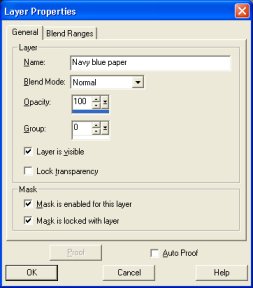
Creating the navy blue layer
Selecting Layers
Now select this layer using the layer Palette. Anything you draw on the image now will affect only this layer. All other layers, including the background, will be left untouched by changes to this layer.
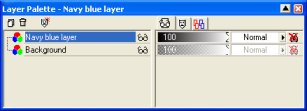
Selecting the navy layer
Now use the Select tool to highlight a large square area inside the layout, leaving a 3/4 inch border around the edges. Use the Flood Fill tool to make this area navy blue. Apply the same texture and inner bevel to this selection as we did for the background.
The two blue squares
Adding Placeholders
We are going to place two photographs on this layout. Add two contrasting blue strips to make placeholders for the photographs and some descriptive text. Here we use similar methods as before, but choose a different texture if you wish.
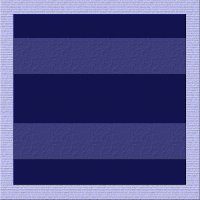
The two contrasting blue strips
Adding the Photographs
Now we shall add the photographs. Create a new layer for each one. Move them around to see where they look best before settling on a final location. These photographs came from a digital camera and were resized as required. This is a great way of obtaining photographs for computer scrapbooking. An alternative method would be to scan real photographs. Apply the inner bevel technique to the photographs to make them look like they are standing slightly proud of the surface they are resting on.
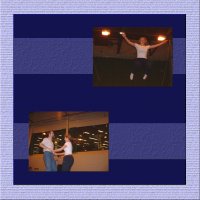
Adding the photos
Adding Descriptive Text
We have left room by the side of each picture to add a little box with some descriptive text in it. Create a new layer and add a piece of very pale yellow "paper" to add your text to. Use similar texturing and inner beveling techniques as before. Use Paint Shop Pro to add some dark blue text on top of the paper.
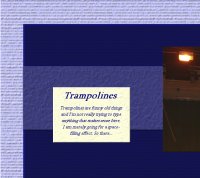
Adding the descriptive text
Creating Torn Mats
The layout looks a little basic at the moment, so we shall try and add some torn mats to border the photographs. Create a new layer behind the first photograph. With the photograph still visible, use the Freehand Select tool to draw a rough rectangle around the photograph - the shakier the better!
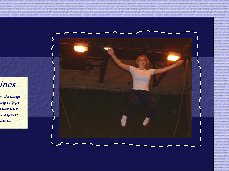
Selection of the torn mat region
Fill the selected area with the same pale blue that you used for the background. Apply a texture to it and apply the inner bevel effect again. Notice that the photograph was unnaffected as it sits on a layer above the one we are working on. It should now look as though the photograph has been placed on a torn mat.

Finished torn mat effect
The Final Layout!
Now go and add torn mats for the other photograph and the pale yellow text areas and the layout is complete!

The final layout (reduced to 400x400 pixels)
Okay, so that's it. I hope you found this guide useful and that it has filled you with inspiration. If you have any comments or suggestions, then please get in touch via the address at the bottom of the page.
Search this site
Copyright Paul Mutton 2001-2013
http://www.jibble.org/
Feedback welcomed
![]()